
Our expert tips for
successful voice recording
1. Prepare the recording
First off, let’s take a look at the basic ways you can prepare yourself and
your recording technology for the voice-over. Let’s go!
Find a room with good acoustics.
 If you’re not recording your voice-over in a professional studio, you should choose your setting carefully. Find a room with good acoustics, ideally a smallish room with a low ceiling where you can hear as few background noises as possible. To identify subtle interfering noises prior to the recording, it can be helpful to make a test recording of the pure ambient sound and play this back to yourself a little louder.
Warm up your voice.

Drink enough liquid prior to and during the recording. This keeps your vocal chords moist and pliable. Water is ideal; avoid coffee, milk and alcohol if possible, as these can irritate the vocal chords. Besides, a slurred voice could make your video sound unprofessional. Ensure you have a glass of water at the ready prior to recording. Clear your throat, but don’t overdo it and aggravate your vocal chords. Got a frog in your throat? A spoonful of honey can work wonders!
Mike-Test!

Check your external microphone and ensure that the gain level isn’t set too high or too low. Make a test recording to find the perfect volume for your voice, and adjust the level as required. If you have a pop filter handy, place it in front of the microphone. It prevents crackling, popping and hissing of sounds that are created unintentionally. If you prefer not to use an external microphone, you can also make the recording using your laptop’s internal mike.
Done! You’ve completed the first steps, and your improvised speaker’s booth is ready for the recording. We can now get to the functions of simpleshow video maker, which support you as you record your voice-over.
2. And this is how it works in simpleshow video maker:
We recommend using the Chrome and Firefox browsers when recording your voice-over in simpleshow video maker.
Unfortunately, Microsoft Internet Explorer is technically obsolete and no longer supports
the Flash Player software required for the recording.
You should start your voice-over recording in the finalization phase of your simpleshow video maker project. To do this, click on “Record”.

If your browser supports the Flash plug-in, a pop-up window appears after you have clicked on “Record own voice”, via which you can give simpleshow video maker access to your microphone to facilitate the recording process. To do this, click on “Authorize”.
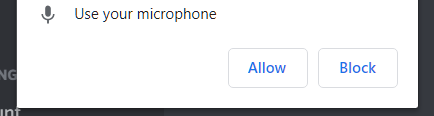
If you do not have administrator rights to the browser, you will need the support of an administrator to activate the microphone.
To do this, ask your co-workers in the IT division. By the way: The little “i” next to the recording function in simpleshow video maker
will show you if you’re still waiting on authorization.
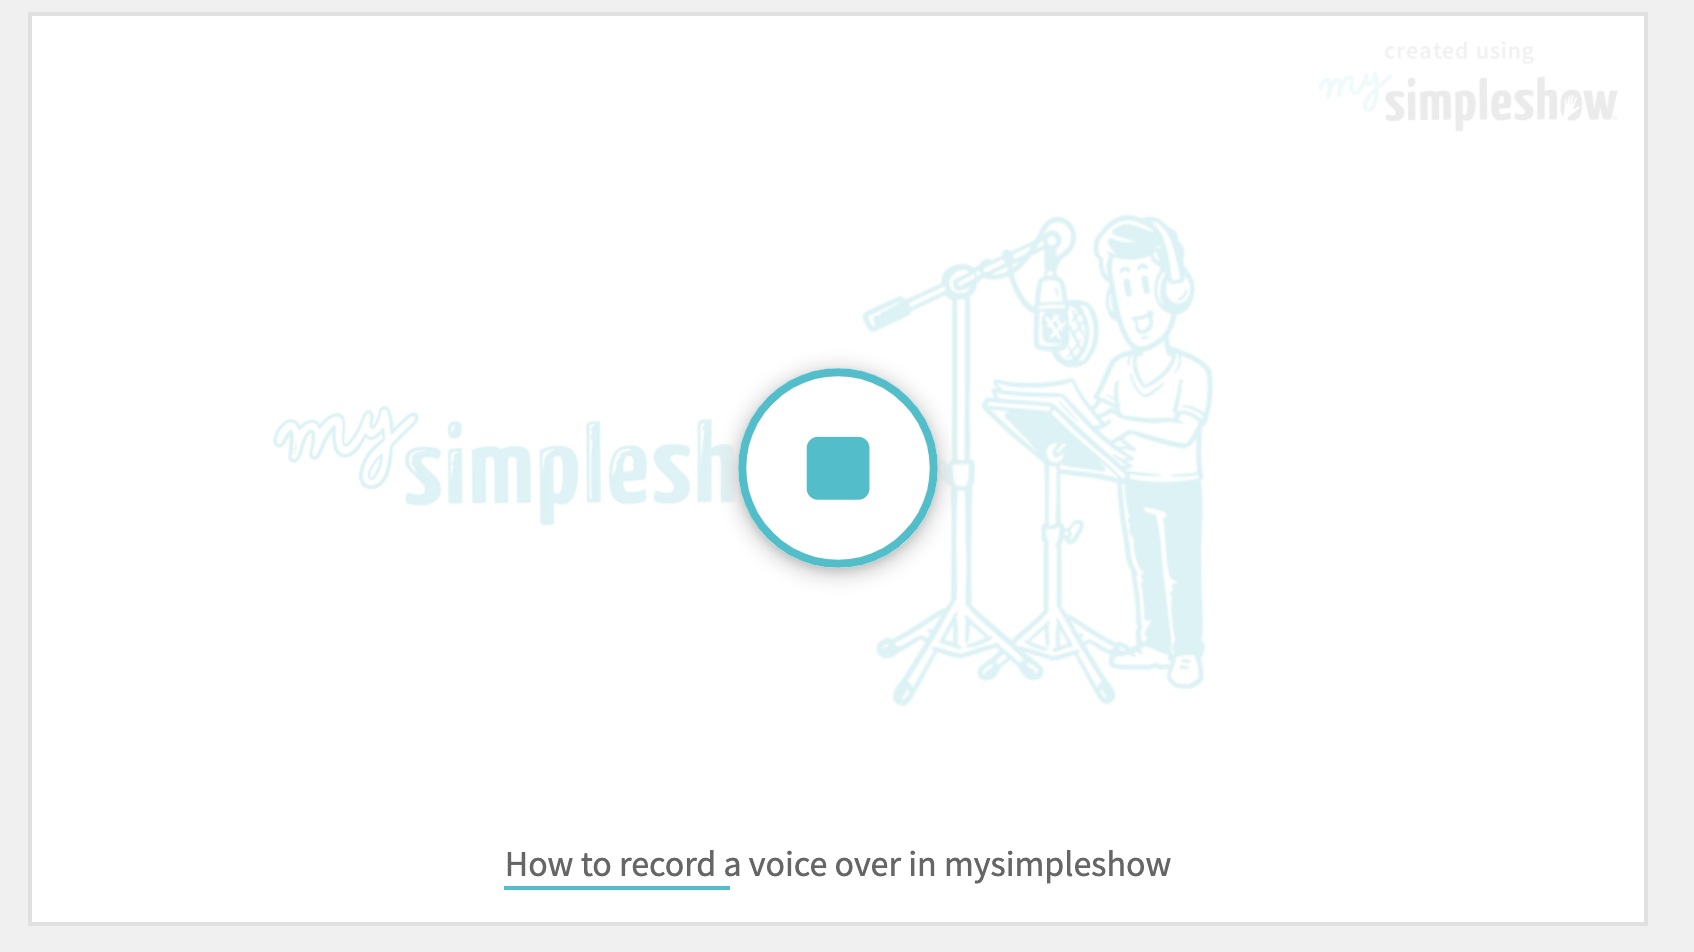
When authorization to record is saved in your browser, a turquoise microphone appears for each scene you record.

You can now record your voice-over scene by scene. The text will appear on the image for this purpose, while a colored strip will help you find the correct speech rate — just like karaoke. You can now sing … umm … record your voice-over.
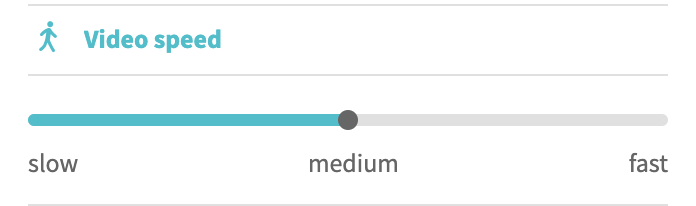
Don’t let the little bar put you under pressure. If it’s too fast for you, you can adjust the video speed on the menu on the right-hand side.
You can also make the recording as many times as you need. You can listen to your attempts again each time after recording is complete. All you need to do is click on the turquoise play button which appears. But don’t panic: Most people find the sound of their own voice a little disconcerting when they hear it for the first time.
![]()
If you want to start another recording, simply click on the microphone in the scene once more. If you’d like to hear all the recordings again in one go, you can use the video preview function in the top right-hand corner.
3. The voice-over recording
The technology’s ready, the simpleshow video maker program is displaying your text and you’re armed with a glass of water. Before you get started, we, and our professional speakers, would like to give you a few tips that you can use to transform your voice-over from a simple voice recording into a professional voice-over.
![]()
Timing is everything.
Timing is key for your simpleshow video maker voice-over! For maximum comprehension of your message, it’s important to ensure that the buzzwords are spoken at the same time the respective images appear in the video. We advise you to test your timing for each scene before you record the voice-over. That way, you’ll notice where you have to speak faster or more slowly in order to match the scribbles to the buzzwords.
![]()
Emphasize deliberately.
Read through your text prior to recording and identify the strongest carrier of meaning in each sentence. This is the word which has the greatest significance in that particular sentence. Emphasize this word slightly more than the others. You can do this by altering the pitch or volume of this word at the appropriate point. You can also draw out the pronunciation of the word somewhat or place individual stress on its syllables.
Inject some emotion!
Make a conscious decision as regards where you’d prefer to sound more emotional and where you intend to sound matter-of-fact. Speaking more emotionally means that the pitch fluctuates more considerably. On the other hand, being matter-of-fact means that the voice is less melodious.
![]()
Vowels—key to a successful voice-over.
You should also pay close attention to the vowels. They lend your voice its tone and sonority. Most people tend to speak slightly too fast during the recording process because they are nervous. So speak slightly more slowly than you would usually do. Give the vowels space to resound. And allow yourself some breaks!
That’s it from us. We’ll leave you to our three professional speakers to reveal the true expert tips. Enjoy!
4. Speaking tips from the horse’s mouth!
 |
||
|
|
Duane Doherty |
|
By the way: Are you just as impressed with our speaker’s voices as we are? Thenis into your simpleshow video maker project—quickly and we’re sure you’ll be happy to hear that you can book him for a professional voice-over. We’ll integrate this into your simpleshow video maker project—quickly and easily.

If you’ve recorded your voice-over on another device and wish to import it into your simpleshow video maker project, this is no problem either.
Use these file formats to upload your voice-over to simpleshow video maker:
“audio/mp3”, “audio/mpeg”, “audio/mpeg3”, “audio/x-mpeg-3”, “audio/mp4”, “audio/wav”, “audio/wave”, “audio/x-wav”,
“audio/aiff”, “audio/aifc”, “audio/x-aifc”, “audio/x-aiff”, “audio/x-m4a”, “audio/flac”